Showing posts with label beauty. Show all posts

Tulip Nail Art ft. PRITI NYC


So here we are, only a month left until Spring officially starts - and already I'm excited for winter to be over… if only all the Canadian snow would melt. Today we have a manicure for you which features a brand which is new to us, Priti NYC. This brand is non-toxic and 4 free, or free of 4 known carcinogens including  toluene, dibutyl phthalate (DBP), formaldehyde, and camphor. Many brands are marketing themselves as 3 free recently - for more on what this means see All Laquered Up's great resource on this topic!

Priti NYC was started in 2005 by founder Kim D'Amato with the goal of reducing harmful chemicals and supporting organic farmers - and we have to say that it is a success! For all the eco-friendly non-believers out there, these polishes will change your mind, no question about it. Crown of Thorns (a gorgeous baby blue) delivers in terms of colour payout and opacity. We cannot get enough of this colour and have been rocking it solo with an accent nail. For all the pastel lovers rejoicing at Spring's new collections - this colour is for you!

To help usher in the Springtime, we used a few (but really, 8) of Priti NYC's shades to create a full finger tulip mani, putting accent nail florals to shame! This mani was created using Crown of Thorns as a base. We started by using the darker pink and yellow (Nice Gal Peony and Lampshade Poppy, respectively) to draw a U shape with a thin brush wherever we wanted the flowers to be. We tried to make each nail different - that's part of the fun! Then we used the lighter pink and yellow (Ballerina Peony and Horned Poppy) to fill the U half full with the same nail art brush. While waiting for the tulips to dry before adding white, we used a clean nail art brush to draw stems in Baby Tears from the base of each tulip to the free edge of our nail. We added some leaves for fun, and then used the lighter green shade, Love Patt, on top, to give a more dimensional look to the leaves. To finish this mani, we used White Ballet Dahlia on the tips of both the tulips (using a clean nail art brush). Then we used our favourite Seche Vite topcoat, and allowed to dry. Check out the picture below, and let us know what you think!
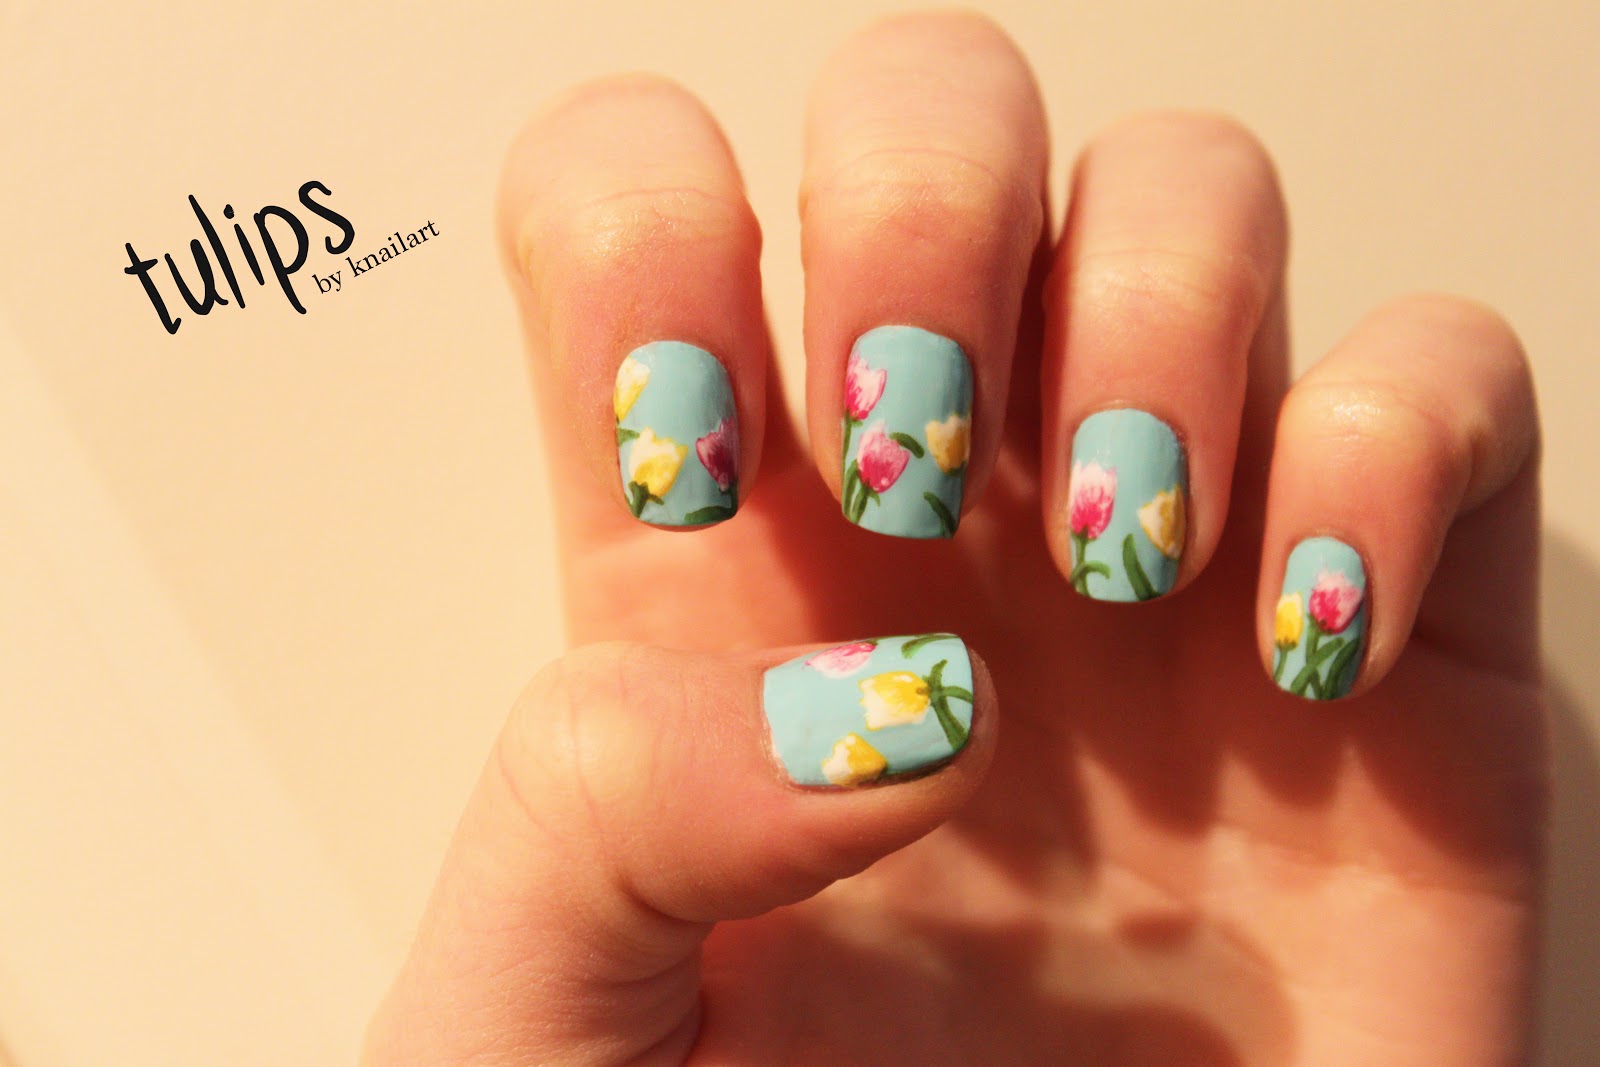

Overall, the Priti NYC polishes were easy to apply and had a better smell than most other nail polishes - which we love! We definitely recommend checking out Priti NYC, you can find them on Facebook, Twitter, and Pinterest!

Disclaimer: These products were provided to us by the company/PR for our honest consideration and review.

Spring Striped Mani


Spring has sprung! Or is that just our nails? Regardless, we're getting in to the season by sporting some bright and pastel stripes on our fingertips. For this look we used a variety of brands and colours, but the fun of this mani is mixing and matching! Gather a bunch of your favourite polishes and go with the flow. We used striping tape, available here, to create the straight edges for our lines - but you could just as easily use a thin paint brush available at your local craft store.


We started with OPI's Alpine Snow for our base, a classic white with great coverage. We used Seche Vite top coat and let that dry for about 10 minutes, to ensure the striping tape didn't strip the white polish. Then we applied striping tape at different intervals to achieve the bands of different thickness. We used a few of our favourite colours, examples above, to paint within the boundaries of the striping tape. Alternating the order of your colours on each nail makes this mani even more playful, we tried to keep each nail different! Then, after a few minutes drying time, we carefully peeled off the striping tape and finished with a second coat of top coat! Voila, stripes for spring!

Valentine's Day Nail Art

 With Valentine's Day right around the corner, we think it's the right time to get in the spirit and embrace the heart-filled nail art craze. To keep this mani fun and fresh, we used an OPI Liquid Sand Shade on the thumb and ring finger, and used a bold red with black and white accents on the remaining fingers. We love the results, and the added texture from OPI Liquid Sand makes this mani even more interesting to look at! If you can't get your hands on OPIs Liquid Sand collection, we recommend a glitter accent nail in a coordinating shade.

What you need:

  • Red nail polish (we used Nails Inc. St. James, available here)
  • White nail polish (we used China Glaze White on White, available here)
  • Red Liquid Sand nail polish/Glitter nail polish (we used OPI Liquid Sand The Impossible, available here)
  • Black nail polish (we used Essie Licorice, available here)
  • Nail art brush (available, as a set including a dotter, here)
  • Base coat and top coat (we used Essie First Base, available here, and Seche Vite top coat, available here)
What to do:
  1. Paint all nails with a base coat.
  2. Paint your accent nails (thumb and ring finger) with the red liquid sand (or glitter) polish, and all other fingers with a red polish. Do 2-3 coats as required.
  3. Pinky: Use black polish on half of the nail, and paint the top half of 'LOVE' using a nail art brush. After that dries, use the (clean) nail art brush and white polish to connect the bottom half of 'LOVE'.
  4. Middle Finger: Using the nail art brush and black polish, starting at the centre of the nail, make two dots and then drag the dots together, making a small heart. Repeat this until the nail is covered. Then, using a clean nail art brush, put white polish inside one of the hearts as an accent heart.
  5. Pointer Finger: Using white nail polish and a nail art brush, draw many xo's all over the nail, and then draw a larger white heart in the centre of the nail (following the procedure in step 4). Then, using a clean nail art brush, fill in the white heart with black  polish.
  6. Allow all to dry, and paint with a top coat! Note: for OPI Liquid Sand, do not topcoat, as the matte 'sand' effect will be lost.


Completed Valentine's Day Nails

Monarch Butterfly Wing Nails

Monarch Butterfly Wing Nails


The Monarch Wing Nails on a full hand.


Why we love these:

These nails reflect the beauty of mother nature, and are fun and easy to do! We love mixing this look up with different backgrounds colours (full silver glitter butterfly, anyone?) and even using it as an accent nail to liven a tired mani!

What you need:

  • White Polish (we used OPI Alpine Snow, buy it here)
  • Black Polish (we used Essie Licorice, buy it here)
  • Orange Polish (we used Misa Speed of Life, buy it here)
  • Gold Shimmer Polish (we used Chanel Gold Fiction, buy it here)
  • Base Coat and Top Coat (we used Essie, buy the top coat here, and base coat here)
  • Nail Art Brush and Dotter Tool (buy both in a set here here)
  • Makeup Sponge (we used something similar to the Make Up For Ever HD Sponge, buy it here)

What to do:

  1. Start with clean, dry nails. Paint each nail with base coat.
  2. Paint each nail with two coats of your gold shimmer polish, and allow to dry fully (this is the most important part!).
  3. Soak your makeup sponge in water - so it doesn't absorb all of the polish - and paint your orange polish on to one side. Begin sponging at the tip of your nail, and move  3/4 of the way towards one upper corner, creating an ombre style fade of orange polish in to the gold shimmer polish.
  4. Using your nail art brush and black polish, paint a diagonal black line from the upper top corner to the opposite bottom corner of your nail. Perpendicular to this black line, draw another black line near the top of your nail.
  5. Use the nail art brush to draw two more black lines, dividing the bottom section of your nail in to 4 quarters. Fill in the tip of your nail creating rounded edges (see photo below for clarification).
  6. Using the dotter tool and white polish, make some white spots on the black tip of your nail.
  7.  After ensuring your nails are dry enough to top coat without running (allow about 5-10 minutes), paint the top coat over your whole nail and the tip of your nail and allow to dry!

Close up of a Monarch Wing nail.