
Hey everyone!
We tried to match our ultimate summer favourites - our Ray Ban Green Flash aviators! We used a sponged gradient of O.P.I. Angel with a Leadfoot, Essie Vices Versa, Sally Hansen Dive In, and Essie I'm Addicted over two coats of O.P.I. Push & Shove to create this super fun look. Check out the video tutorial to see how we did it!
This looks super amazing in the sun... If you try it out, let us know by tagging us @knailart or using the #knailart everywhere social!
Our Bio Sculpture Gel Experience + Feather Nail Art!

Bio Sculpture Gel is the only gel to have a clinical trial and a five-star safety rating, and soak off without acetone! We wore these for two weeks before our impatience kicked it, but we think we could have stretched it one or two more weeks (if we didn't have polish ADD).
Bio Sculpture Gel has three different options for flexibility, and we went with Flexi gel - the medium option! The free edge gel was added to extend the natural nail, and after buffing we were left with gorgeous, completely natural looking nails! We were totally impressed... and if you want to see the 'before' shot, click here.

We then decided to go with a bright blue coloured gel shade from their Carnival trend collection - it's number 175, Havana Nights. After that, we topped the look off with some fun feathered nail art!
Check out the progression of our mani below, and let us know if you've tried out Bio Sculpture Gel!


Disclaimer: Some of the products or services mentioned in this post may have been provided by the company/PR in exchange for our honest review.

SWATCHED: A England Excaliber Renaissance and Hurt No Living Thing
One of our favourite online retailers, NailPolishCanada.com recently stocked some amazing A England lacquers - so we were very excited to get to try this brand for the first time, and we were not disappointed!
 |
| A England Excalibur Renaissance |
 |
| A England Hurt No Living Thing |
Hurt No Living Thing is a dusty grey jelly with fuchsia micro shimmer. This polish is an amazing summer shade, as it doesn't look to heavy on the nails, and it has great shine in the sun! This swatch is three coats, and we imagine you could reach full opacity in four.
Overall, we are super impressed with our first experience of A England! We would definitely recommend this brand and will be checking out more of their shades at NailPolishCanada.com, we've seen some of their holographic polishes and can't get enough!
Let us know what you think of these, or whether you have any A England shades to recommend in the comments!
THE BEST NEON NAIL POLISH: Tie Dye Nail Style
 |
| Neon Tie Dye Nails with TNA Clemente Shorts, Pandora Heart Ring and Dotted Ring, and Tiffany and Co. Sterling Silver Infinity Ring |
THE BEST NEONS FOR NAIL ART:
Yellow - Orly Glowstick
Orange - O.P.I. Juice Bar Hopping
Pink - Essie Bottle Service
Purple - O.P.I. Push & Pur-Pull
Blue - Essie Bouncer It's Me
Green - Models Own Toxic Apple
If you have any great neon polishes, let us know in the comments so we can put them to the test!
Disclaimer: Some polishes used were received from the company/PR - however, our opinions are our own. This post contains no sponsored links!
 |
Disclaimer: Some polishes used were received from the company/PR - however, our opinions are our own. This post contains no sponsored links!
NOTD: Essie Too Taboo ft. BA Star Pink Glitter Accent Nail
 |
| Essie Too Taboo with B.A. Star Fire Magenta Glitter Accent Nail |
SWATCHED: Essie Neon Collection 2014
 |
| Essie Too Taboo |
Today we're sharing our swatches of Essie's 2014 Neon collection - the title shade is Too Taboo, a bold deep fuchsia. All of our swatches are two coats with one coat of white underneath - although some of the shades (including Too Taboo) don't really need the white. The jelly shades do require a white to truly be considered neons. We love Too Taboo, and found the shade slightly unique in our collection, which tends to be pink heavy.
 |
| Essie Chills & Thrills |
 |
| Essie I'm Addicted |
 |
| Essie Serial Shopper |
 |
| Essie Sittin' Pretty |
 |
| Essie Vices Versa |
Let us know what you think of this collection and if you pick up any shades! Happy polishing!
Disclaimer: Some or all of the products mentioned may have been provided to us by the company/PR in exchange for our honest consideration.
NOTD: Hawaiian Nails!
 |
| Hawaiian Half Moon Mani |
Let us know what you think of these nails in the comments - would you wear them? Happy polishing!
Hand Care Hacks: 3 Steps for Happy, Healthy Hands
 |
| LUSH Cosmetics Lemony Flutter Cuticle Butter, Tiny Hands Hand Lotion Bar, and Putty for your Hands |
 |
| LUSH Cosmetics Putty for your Hands |
First we used Putty for your Hands, an exfoliating hand scrub. We recommend adding a little warm water and scrubbing for 30 seconds! If you have extra dry cuticles, you can also use a light buffing tool or nail file to remove some of the dry skin without clipping and breaking the cuticle.
 |
| LUSH Cosmetics Lemony Flutter Cuticle Butter |
| STEP 2: HYDRATE YOUR CUTICLES! Because your cuticles can become extra dry from polishing compared to the rest of your hands, its key to use a super-rich hydrating oil or cream. We love Lemony Flutter Cuticle Butter (and not just because it sounds delicious) because its thick, creamy and smells amazing!  |
| LUSH Cosmetics Tiny Hands Moisturizing Bar |
STEP 3: HYDRATE YOUR HANDS!
Next we like to hydrate our whole hands to ensure there are no leftover dry patches! We like the Tiny Hands Moisturizing Bar because its thick and not oily on your skin.
OUR RESULTS!
We tried out this routine for 7 days and had amazing results! The first three days were documented with post-treatment photographs and day 7 shows our happy, healthy hands looking good all on their own!
 |
| Day 1 Post-Treatment |
 |
| Day 2 Post-Treatment |
 |
| Day 3 Post-Treatment |
 |
| Healthy, Happy Hands! (Day 7, Pre-Treatment) |
Let us know if you have any handcare hacks of your own! Happy polishing!
Dislcaimer: Some or all of these products may have been sent to us by the company/PR for our honest consideration.
NOTD: imPRESS Press-Ons in Dancing Queen
 |
| imPRESS Press On Nails in Dancing Queen |
What do you think of this look?
Disclaimer: We received these products complimentary from Influenster for testing purposes.
NOTD: Diet Coke Nail Art ft. Coca Cola for O.P.I. Collection

We are huge Diet Coke fans - so when we realized the O.P.I. Coca Cola collaboration had a chrome-y sparkly silver inspired by Diet Coke we were super excited. The background polish is 'Today I Accomplished Zero' and the Diet Coke nail uses My Signature is 'DC' (the silver chrome), Coca Cola Red and our blackest black - YSL Noir Primitif. We also added some bubbles using the vanilla coke shade - You're So Vain-illa. Overall - we love this collection! The silver is to die for... Stay tuned for swatches of the full collection!
NOTD: Essie Neon Gradient
 |
| Essie Neon Collection Gradient (over China Glaze White on White) |
Disclaimer: Some or all of the products mentioned in this post were provided by the company/PR in exchange for our honest review and consideration. All opinions are our own.
TUTORIAL: Holographic Glitter Polka Dot Nails
 |
| YSL La Laque Couture in Noir Primitif with Holographic Glitter Polka Dots |
Happy polishing!
NOTD: The Blues ft. Revlon Lana'i Lagoon
 |
| Revlon Lana'i Lagoon over Revlon Parfumerie Tropical Rain |
SWATCHED: O.P.I. Neon Collection 2014

Today we have the O.P.I. Neon collection for Summer 2014 swatched for you - for all of our swatches we used two coats, with nothing underneath. If you're looking for the neons to pop a bit more, we recommend using a white coat underneath. O.P.I. has released a white base coat with this collection, which we haven't had the chance to check out. We suspect that pigment in a base coat may alter the ability of the base coat to adhere to your nails... But we will have to try it out before we come to any conclusions. On to the polishes...
 |
| O.P.I. Push and Pur-Pull |
 |
| O.P.I. Down to the Core-al |
 |
| O.P.I. You are So Outta Lime! |
 |
| O.P.I. Hotter Than You Pink |
 |
| O.P.I. Juice Bar Hopping |
Juice Bar Hopping is a bright orange-tangerine crelly with serious neon punch! This is the brightest orange we've ever seen, and it applies amazing. This is a great buy for anyone looking for a rainbow of neon polishes.
 |
| O.P.I. Life Gave Me Lemons |
Let us know what you think of these polishes and whether you'll be picking any up for your summer tips!
Disclaimer: Some or all of the products mentioned in this post were provided by the company/PR in exchange for our honest review and consideration. All opinions are our own.
NOTD: Kiss Neon Star Nail Strips + O.P.I. Life Gave Me Lemons

Let us know what you think in the comments section - and happy polishing!
Disclaimer: Some or all of the products mentioned in this post were provided by the company/PR in exchange for our honest review and consideration. All opinions are our own.
TUTORIAL: Purple Floral Heart Accent Nail (Perfect for Mother's Day!)
 |
| Purple Floral Heart Accent Nails - pictured: Maybelline Color Show in Lust for Lilac |
Base: Maybelline Color Show - Lust for Lilac
Flower Petals: China Glaze - Spontaneous
Flower Centre: China Glaze - White on White
Flower Dots: O.P.I. - Push and Pur-Pull
Lighter Purple (between flowers): Quo by ORLY - Sweet Blush
Leaves: Revlon - Lime Basil
Glitter: O.P.I. - Desperately Seeking Sequins
The nail art brush we used is the medium Berkeley nail art brush, and can be found here (not an affiliate link - just sharing!)
Happy polishing - and remember to let us know if you try this out!
THINGS YOU NEED: Nail Polish Removers We Love!
If there's one thing that's important for your nails - its using a good remover. First, you don't want to over-dry your nails with harsh acetone, and second - nobodies nails look good with leftover polish hanging around! Our two favourite polish removers are the Dior Dissolvant Abricot, and the Ciaté Orange Chocolate (Scented...yum!) Nail Polish remover.

The Dior Dissolvant Abricot is acetone-free, which is a huge plus if you have brittle nails. We love this because you can't tell that there's no acetone in the formula - it works just as well as any regular polish remover. And the bottle is gorgeous - so you can't beat that!

The Ciaté Orange Chocolate Nail Polish remover is amazing because the scent is not overpowering, and the quality is great! We use this frequently, and the vitamin-rich formula does not disappoint!
Both retail for a bit more than your average nail polish remover, but when our nails are in need of some TLC, these are the removers we reach for. If you're in the market, we would definitely recommend picking one of these beauties up!
The Dior Dissolvant Abricot is acetone-free, which is a huge plus if you have brittle nails. We love this because you can't tell that there's no acetone in the formula - it works just as well as any regular polish remover. And the bottle is gorgeous - so you can't beat that!
The Ciaté Orange Chocolate Nail Polish remover is amazing because the scent is not overpowering, and the quality is great! We use this frequently, and the vitamin-rich formula does not disappoint!
Both retail for a bit more than your average nail polish remover, but when our nails are in need of some TLC, these are the removers we reach for. If you're in the market, we would definitely recommend picking one of these beauties up!
Mother's Day Floral Nail Art
 |
| Mother's Day Floral Nail Design and LUSH Cosmetics 'Mum' Bubble Bar |
We created this floral mani inspired by a Papyrus Mother's Day Card! Pictured with the LUSH Cosmetics 'Mum' Bubble Bar - a great Mother's day gift option for any mom. Gearing up for Mother's Day, we also put together a quick insta-video tutorial.
Let us know what you think, and if you try out this mani let us know!
Impress Press On Glitter Nails in In The Spotlight
 |
| imPRESS by Broadway Nails in In The Spotlight |
These nails come in both short or a longer, medium-length. The medium length ones fit our longer nail beds perfectly (check out a picture of some neon splatter press-ons on our Instagram!), but the shorter ones are just a bit too short for us. We have also experimented with shaping these nails using a nail file, and it worked out pretty well! Wear time is supposed to be up to a week, but we wore these for a few days with no problem.
To show you some of the short-nail designs, we've borrowed some friends! For this post, Sophie is wearing the Impress Press-ons in In The Spotlight. This look is a orange to yellow gradient, with all over glitter.
Let us know what you think of this look, and whether you would wear these super-easy press-ons!
TUTORIAL: Faded Spring Floral Yin-Yang Nail Art
 |
| Matte Faded Floral Yin-Yang Nail Art |
Get the look - polishes used include:
China Glaze White on White
(Dark to Light)
Pinks - Essie Bottle Service, Essie Boom Boom Room, Revlon Pink Pineapple
Blues - Essie In The Cab-ana, China Glaze For Audrey, Essie Mint Candy Apple
Purples - O.P.I. Push and Pur-pull, Essie Play Date, Essie Under Where
Greens - China Glaze Starboard, Essie The More the Merrier, Essie Navigate Her
Ciaté Speed Coat Pro
Essie Waltz
Essie Waltz
Nicole by O.P.I. Matte Top Coat
What do you think of this look? Let us know in the comments if you try it out!
NOTD: Aqua Gradient ft. Model's Own Emerald Accent Nail
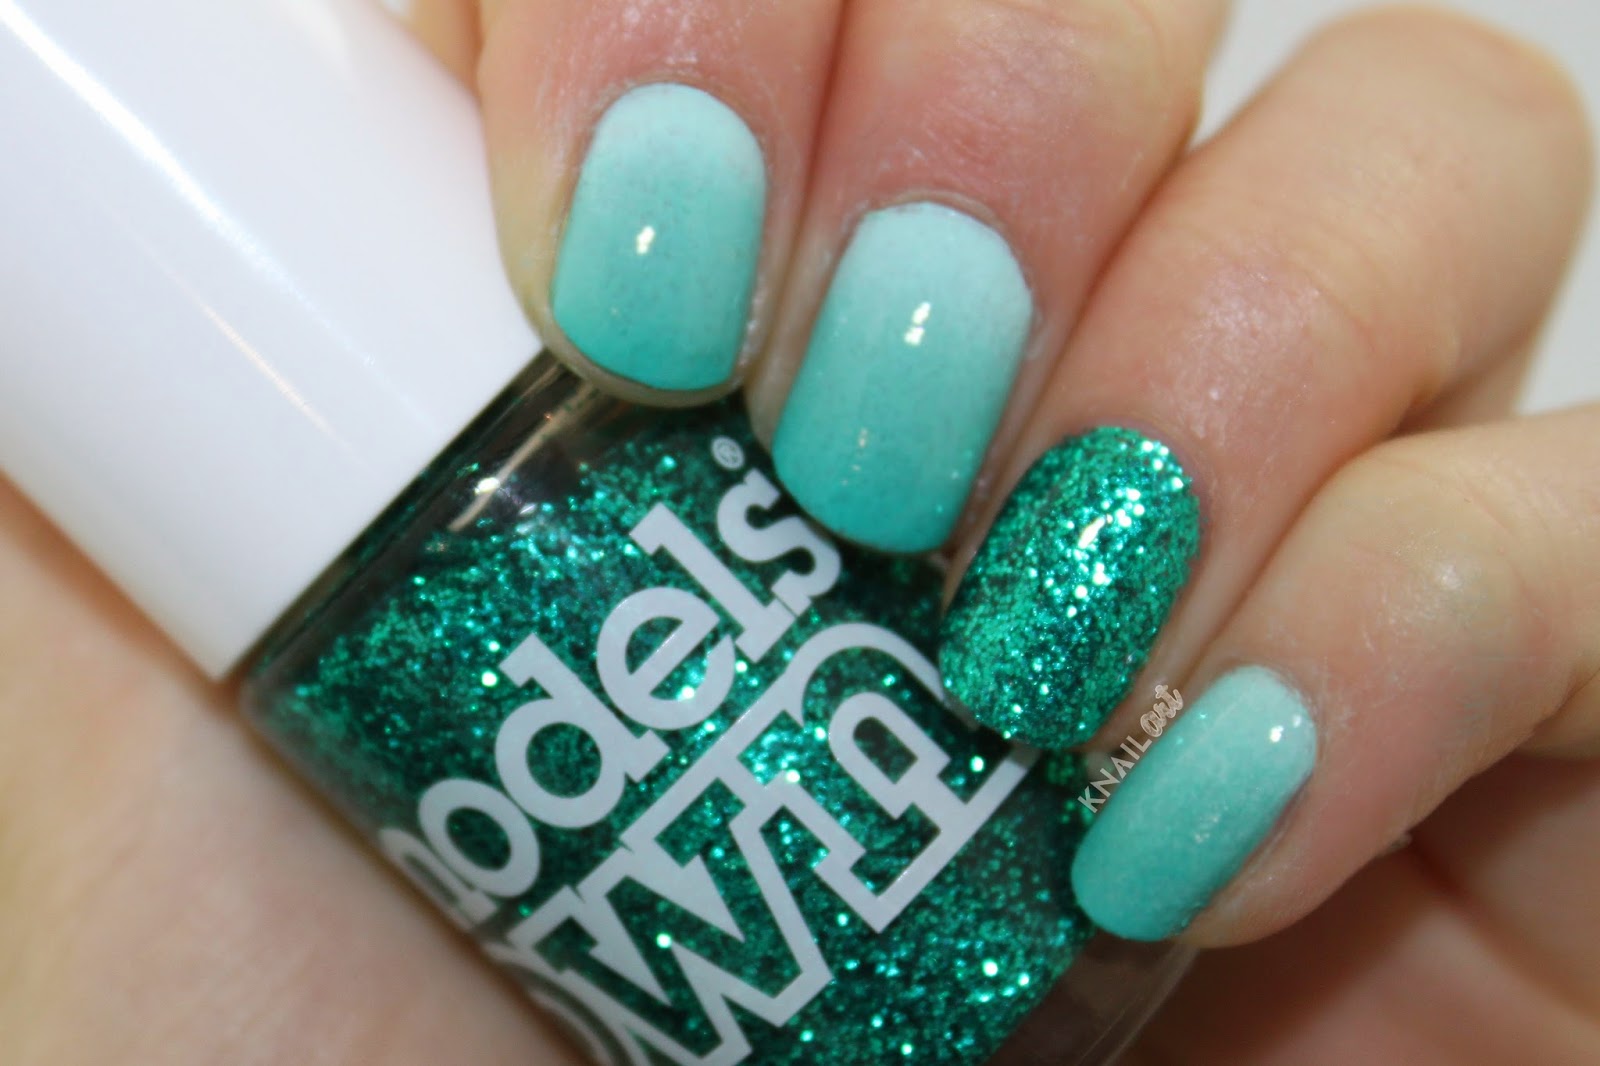 |
| Aqua Gradient and Model's Own Emerald Glitter Accent Nail |
Disclaimer: Some or all of the products mentioned in this post were provided by the company/PR in exchange for our honest review and consideration. All opinions are our own.
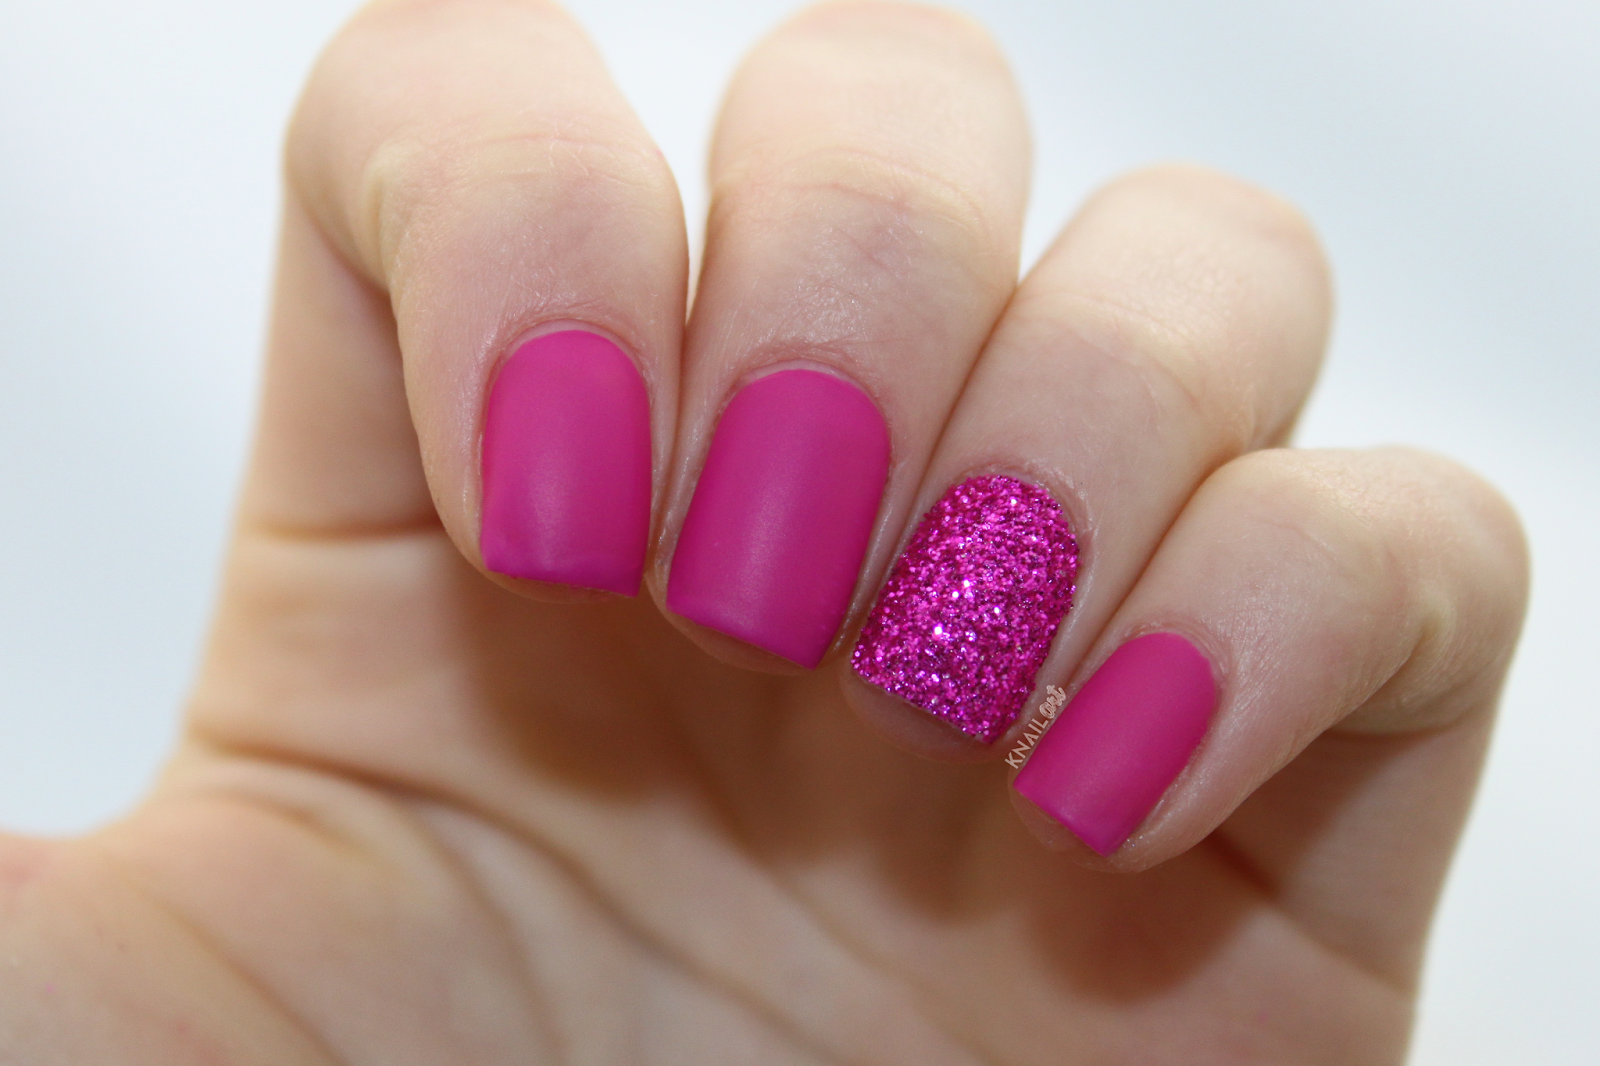
NOTD: Pink Glitter with a Chevron Accent Nail Art
| Quo by ORLY Coral Contour topped with O.P.I. Desperately Seeking Sequins, Essie Licorice Chevron Accent Nails! |
What's on your nails today? Let us know in the comments!
Disclaimer: Some or all of the products mentioned in this post were provided by the company/PR in exchange for our honest review and consideration. All opinions are our own.
NOTD: Glitter Placement ft. China Glaze Glitter Up
 |
| China Glaze Glitter Up Manicure, over China Glaze Sun of a Peach and First Mate |
We used a small brush to pick the glitters out of the polish and used whatever clear base was still on those glitters to stick them down on the nail, creating this pattern. Overall, it actually only took about an hour and a bit for the whole mani, including letting the base polishes fully dry! What do you think of this look?
NOTD: Floral Peace Heart Nails (Motavator Logo!)
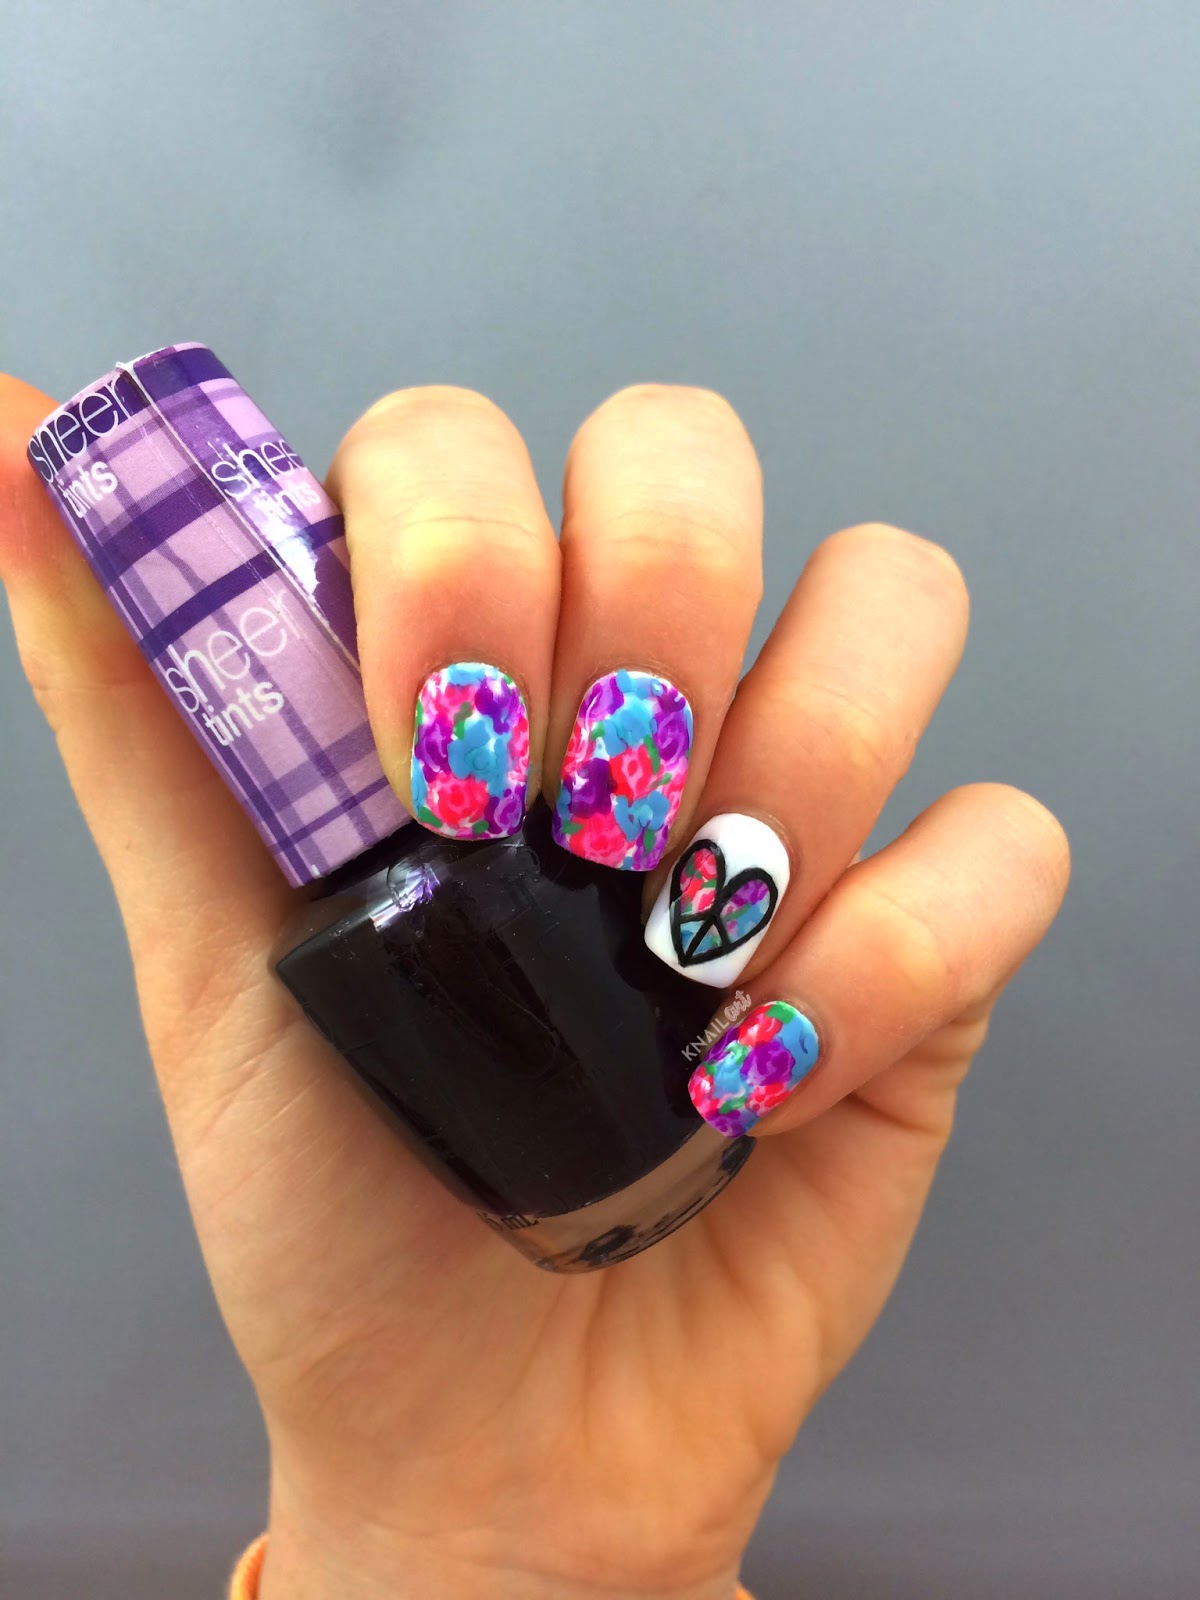 |
| Floral nails ft. Peace Heart accent nail! |
Our white base is our go-to China Glaze White on White. We used O.P.I. Sheer Tints in Be Magentale with Me, I Can Teal You Like Me, and Don't Violet Me Down for the base of the flowers. Then we outlined the flowers with Revlon Ginger Melon, Revlon Tropical Rain, and O.P.I. Push and Pur-Pull. We used Revlon Lime Basil for some random leaves!
For the accent nail - we followed the same steps as above, but finished off the look with a white heart outline, and then used a detail brush to drawl the symbol on in Zoya Raven!
We sped up the accent nail for a quick tutorial video which we posted on our instagram and embedded below... Happy polishing - and if you try out this look be sure to tag #knailart so we can check it out!
NOTD: Holographic Leopard Print Accent Nails ft. Lacquer Lust Pearl
 |
| Lacquer Lust Pearl with a Leopard Accent Nail (Models Own Grape Juice and Essie Licorice) |
The holographic sparkle of this polish is out of control in the sunlight... polish perfection!
NOTD: Floral Press using Ciaté Flower Manicure kit in Strike a Posy
 |
| Ciaté Pepperminty with Ciaté Pressed Flower on Ring Finger, and Ciaté Locket and Confetti (pictured) on Middle Finger |
For today's nails, we've been trying out the Ciaté Flower Manicure kit in Strike a Posy - it comes with a baby pink polish mini, a topcoat (which we love!) and some flowers and tweezers to place them with. More on that kit will be posted soon - but for now we are sharing a look we created using the kit along with some of our other favs from Ciaté! The base colour for this look is Pepperminty, and we used a coat of Locket with two coats of Confetti underneath for a bit of sparkle!
Let us know what you think in the comments, and whether you will be rocking florals to usher in the spring weather!
Disclaimer: Some or all of the products mentioned in this post were provided by the company/PR in exchange for our honest review and consideration. All opinions are our own.
Subscribe to:
Posts (Atom)
0 comments:
We take time to read each and every comment! Thanks so much :)